A portable astronomical observatory for temperate climates
Faced with life temporarily in a rented house, and a desire to have my mount set up permanently, I started working on a design for an observatory that had the following characteristics:
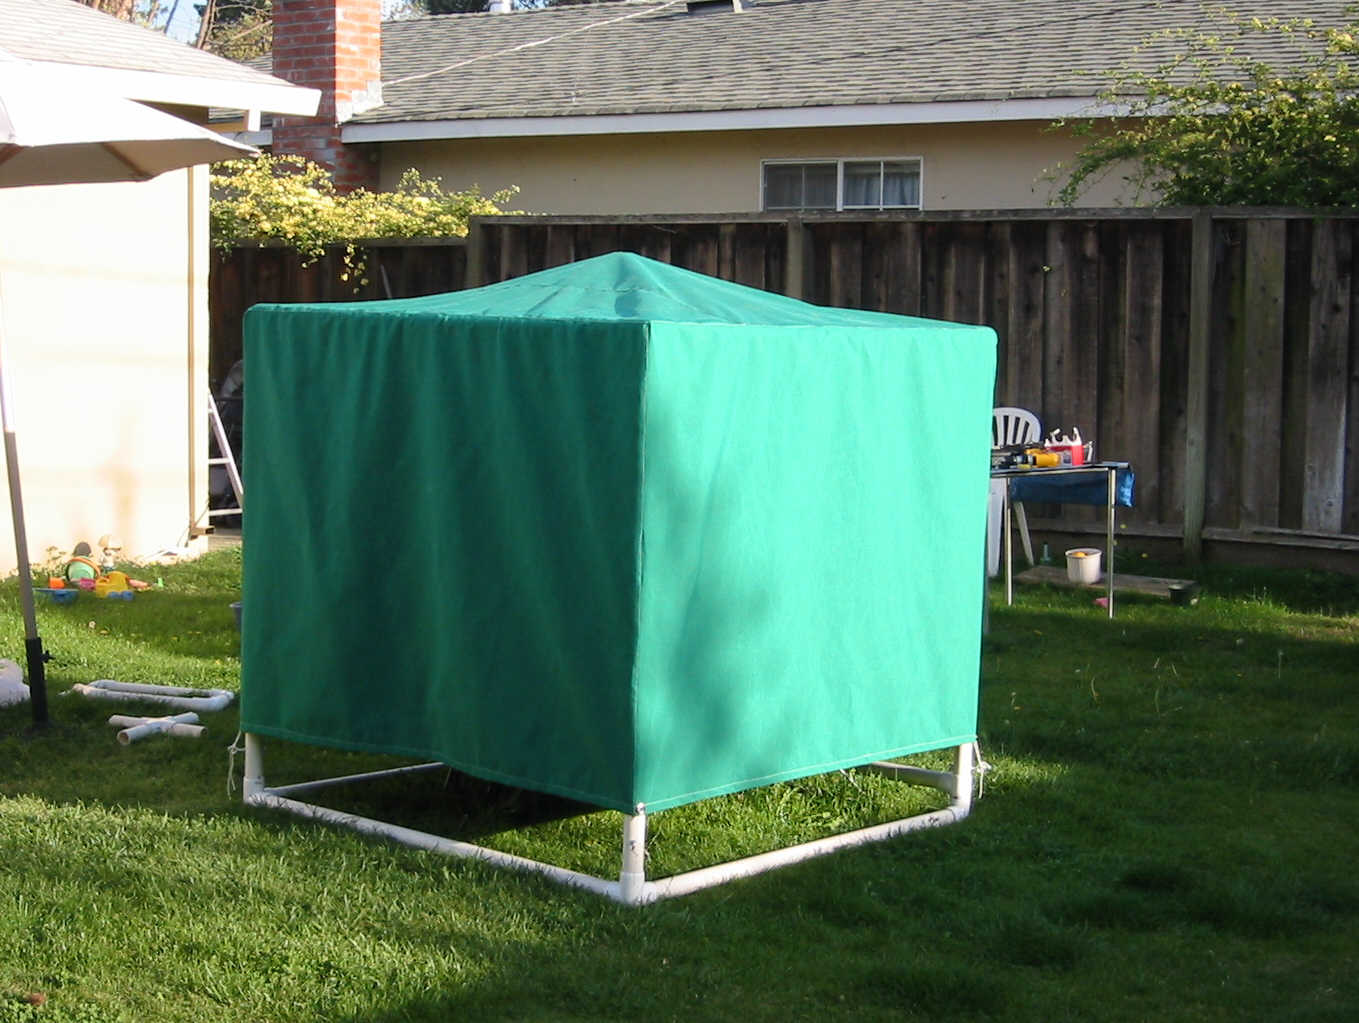
What I ended up doing was create a structure out of PVC plastic, with a custom made cloth covering. The following are a few photos:
|
|
 |
 |
Construction Details
The Frame
The frame is constructed of 1.5" PVC tubing available at any hardware store. The following is a diagram:
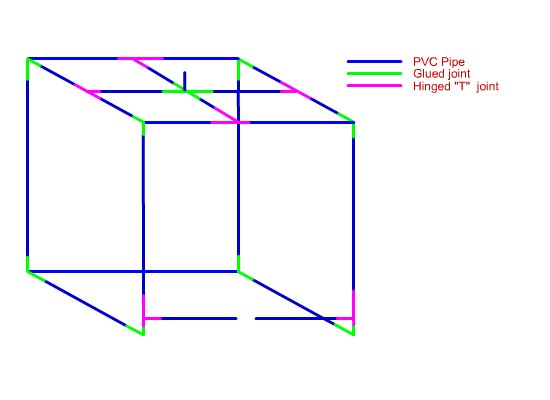
The structure is about 56" on the side, and is styled to look like an expensive piece of covered lawn furniture.
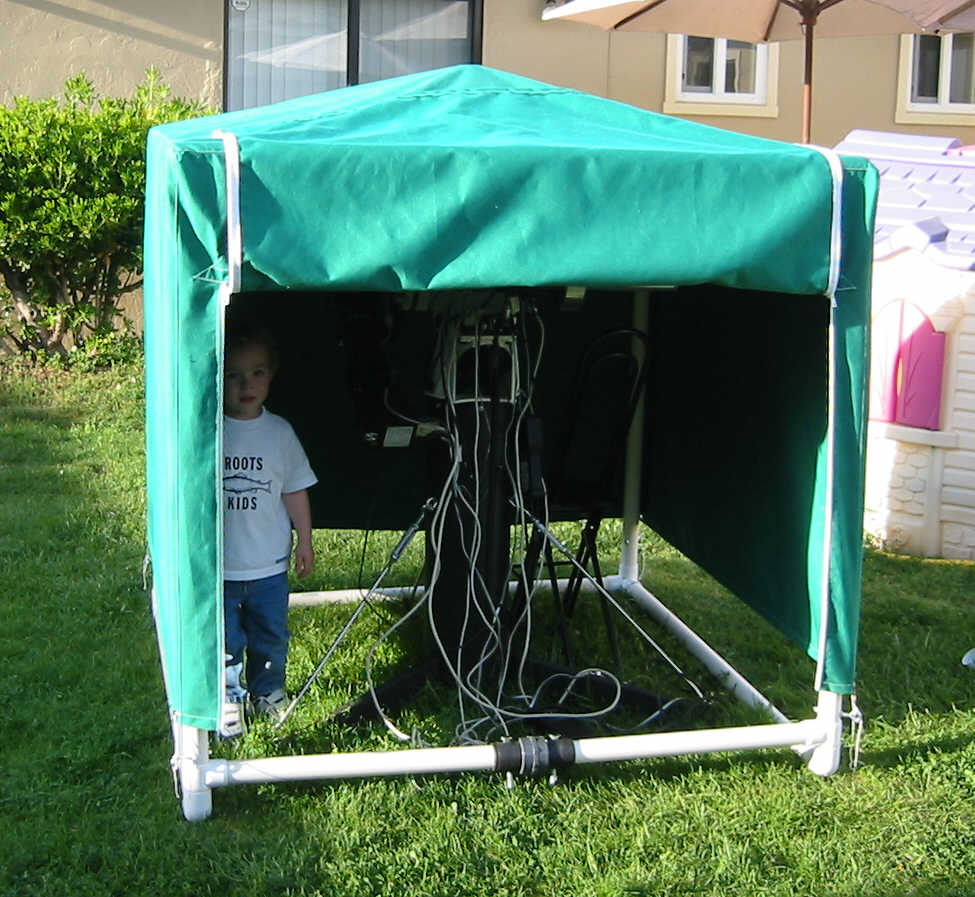
There are really just a few types of pipe fittings used. 6 of the 8 corners are 3-way fittings. The front, lower two corners are two way fittings, as the lower front "cross member" is actually made up of two pipes hinged to the front upright tubes.
PVC "hinges" are used fairly extensively. These are "T" fitting where the long part of the T actually can be penetrated by, and rotates around, a standard piece of PVC. The shorter T piece is glued to its mating pipe (not shown above for clarity). These allow the front cross members to open to drag the observatory off the telescope (also allowed for by the zippers below). They are also used to attach the roof structure (really just a cross with a pole sticking up out of the center) so that it can be simply put in place. The pole should be capped with a smooth PVC cap to not put undue stress on the fabric.
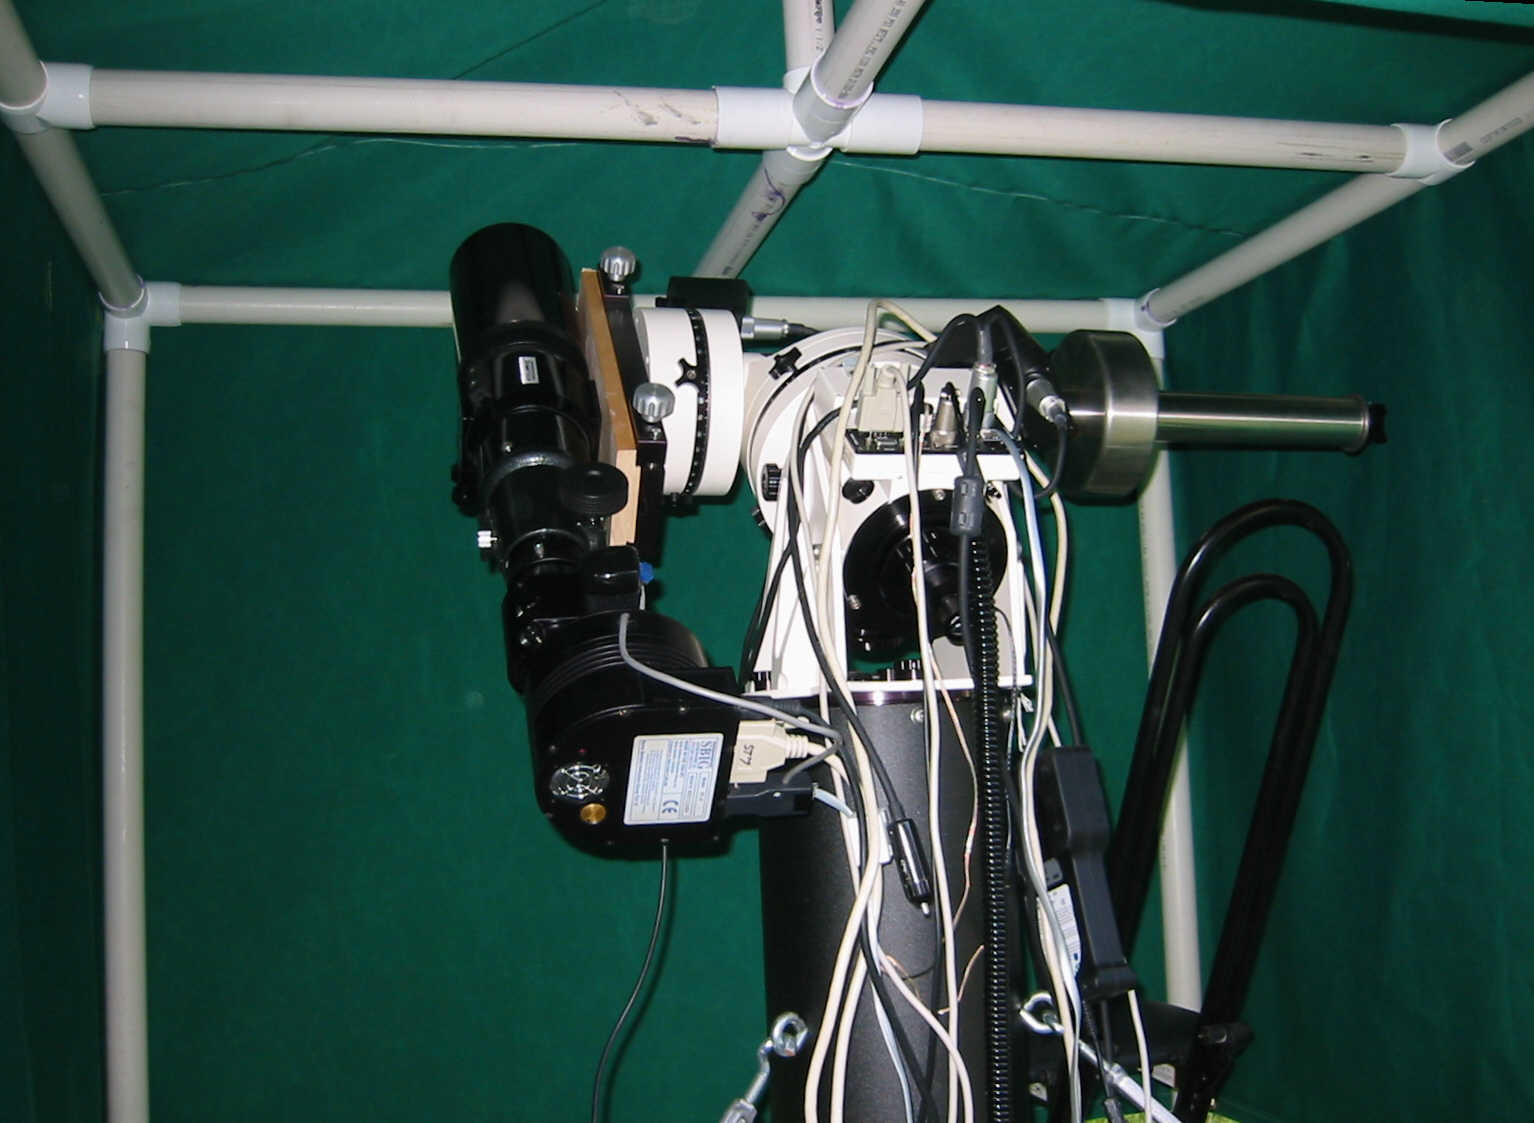
The center of the "roof" is a 5-way pipe. The upper pole is not glued in. As the material stretches over time, I can replace this element with a longer pole to make up for slack.
Many of the pipe fittings were ordered from A-Z Supply over the internet, and are actually intended for furniture construction with PVC, not for plumbing use.
If you look, you will see tha none of the cross members are glued. They are simply slip-fit into the PVC pieces. This allows the entire structure to be broken in half and put in a van.
The Cover
The cover was custom crafted by Grill Wraps, a custom bar-b-q grill manufacturer. Many thanks to Bill Donohue at Grill Wraps who consulted in the design. it is essentially a cloth box, made out of a high quality cover material. One side was fitted with two 36" zippers, which along with the opening lower side, allows the cover to be dragged off the telescope.
Other Details
The cover is held down to the ground in case of high wind by two stakes used to temporarily tie dog leashes in parks. These 18" stakes screw easily into the ground, and provide more security than tent pegs. (not shown above)
The cover is attached to the structure by means of short bungie cords. (not shown - at the time the photos were taken I was temporarily using twine).
The Cost
The entire project cost less than $500 to complete, including having the cover material custom made. It is still to early to talk much of its success, but I will update the web site as I get experience with it.
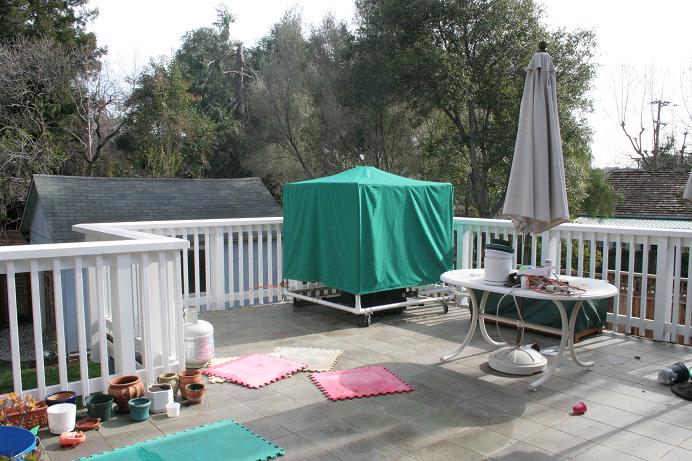
It has now been in use for about 2..5 years, and it has held up very well. It is now on a large deck on the back of our new house.
I have made a few changes:
- It now has wheels. I picked up some casters on ebay, and attached them with U-bolts. Gives it a bit more height too (see below). Makes it easier to drag off.
- The bungies that hold the cover down have been replaced a few times. These wear out faster than anything else on it. The metal clips rust.
- I found that the best way to support the top-center of the tarp (the "peak") is by putting a frisbee on top of the top pole. Its nice rounded edge makes sure that the tarp does not wear. The tension of the bungies keeps it well in place.
In retrospect, I wouldn't do a lot differently. It could be a bit taller, as the door sometimes catches on my OTA's, but then again, it would be more unsightly. I put a couple of hinged lower bars below the "door" - as per the diagram above - it works ok, but rarely gets closed (as you can see if you look carefully in the picture above). So I'm not sure that was worth the effort. It JUST doesn't fit inside my van with the rest of my stuff.
When travelling with it (which I like doing), I strap the disassembled frame to the roofracks of the van, which is a bit of a pain, but not too bad. If I were doing it again, I might spend the time to make it even more collapsable. The cost would be rigidity though.
It was a great investment in a bit of time and money. Well worth it.